Monthly Archives: June 2009

How to Give Someone Elf Ears and Vampire Fangs in Photoshop

3
Filed under Uncategorized

As if the Internet doesn’t have enough weird fetishes floating around, here’s a quick tutorial for beginners on how to give someone elf ears and vampire fangs in photoshop.

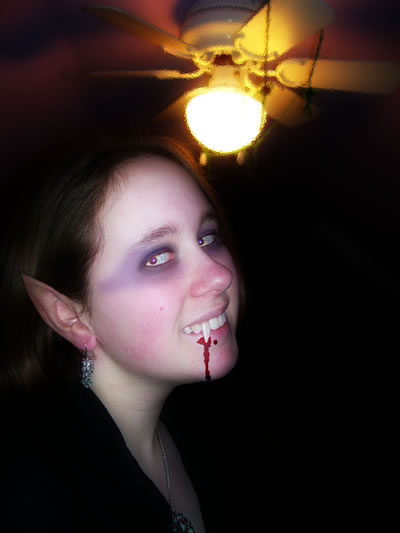
For this tutorial, I’ve used a stock photograph of the beautiful American model, Valerie Hatfield.

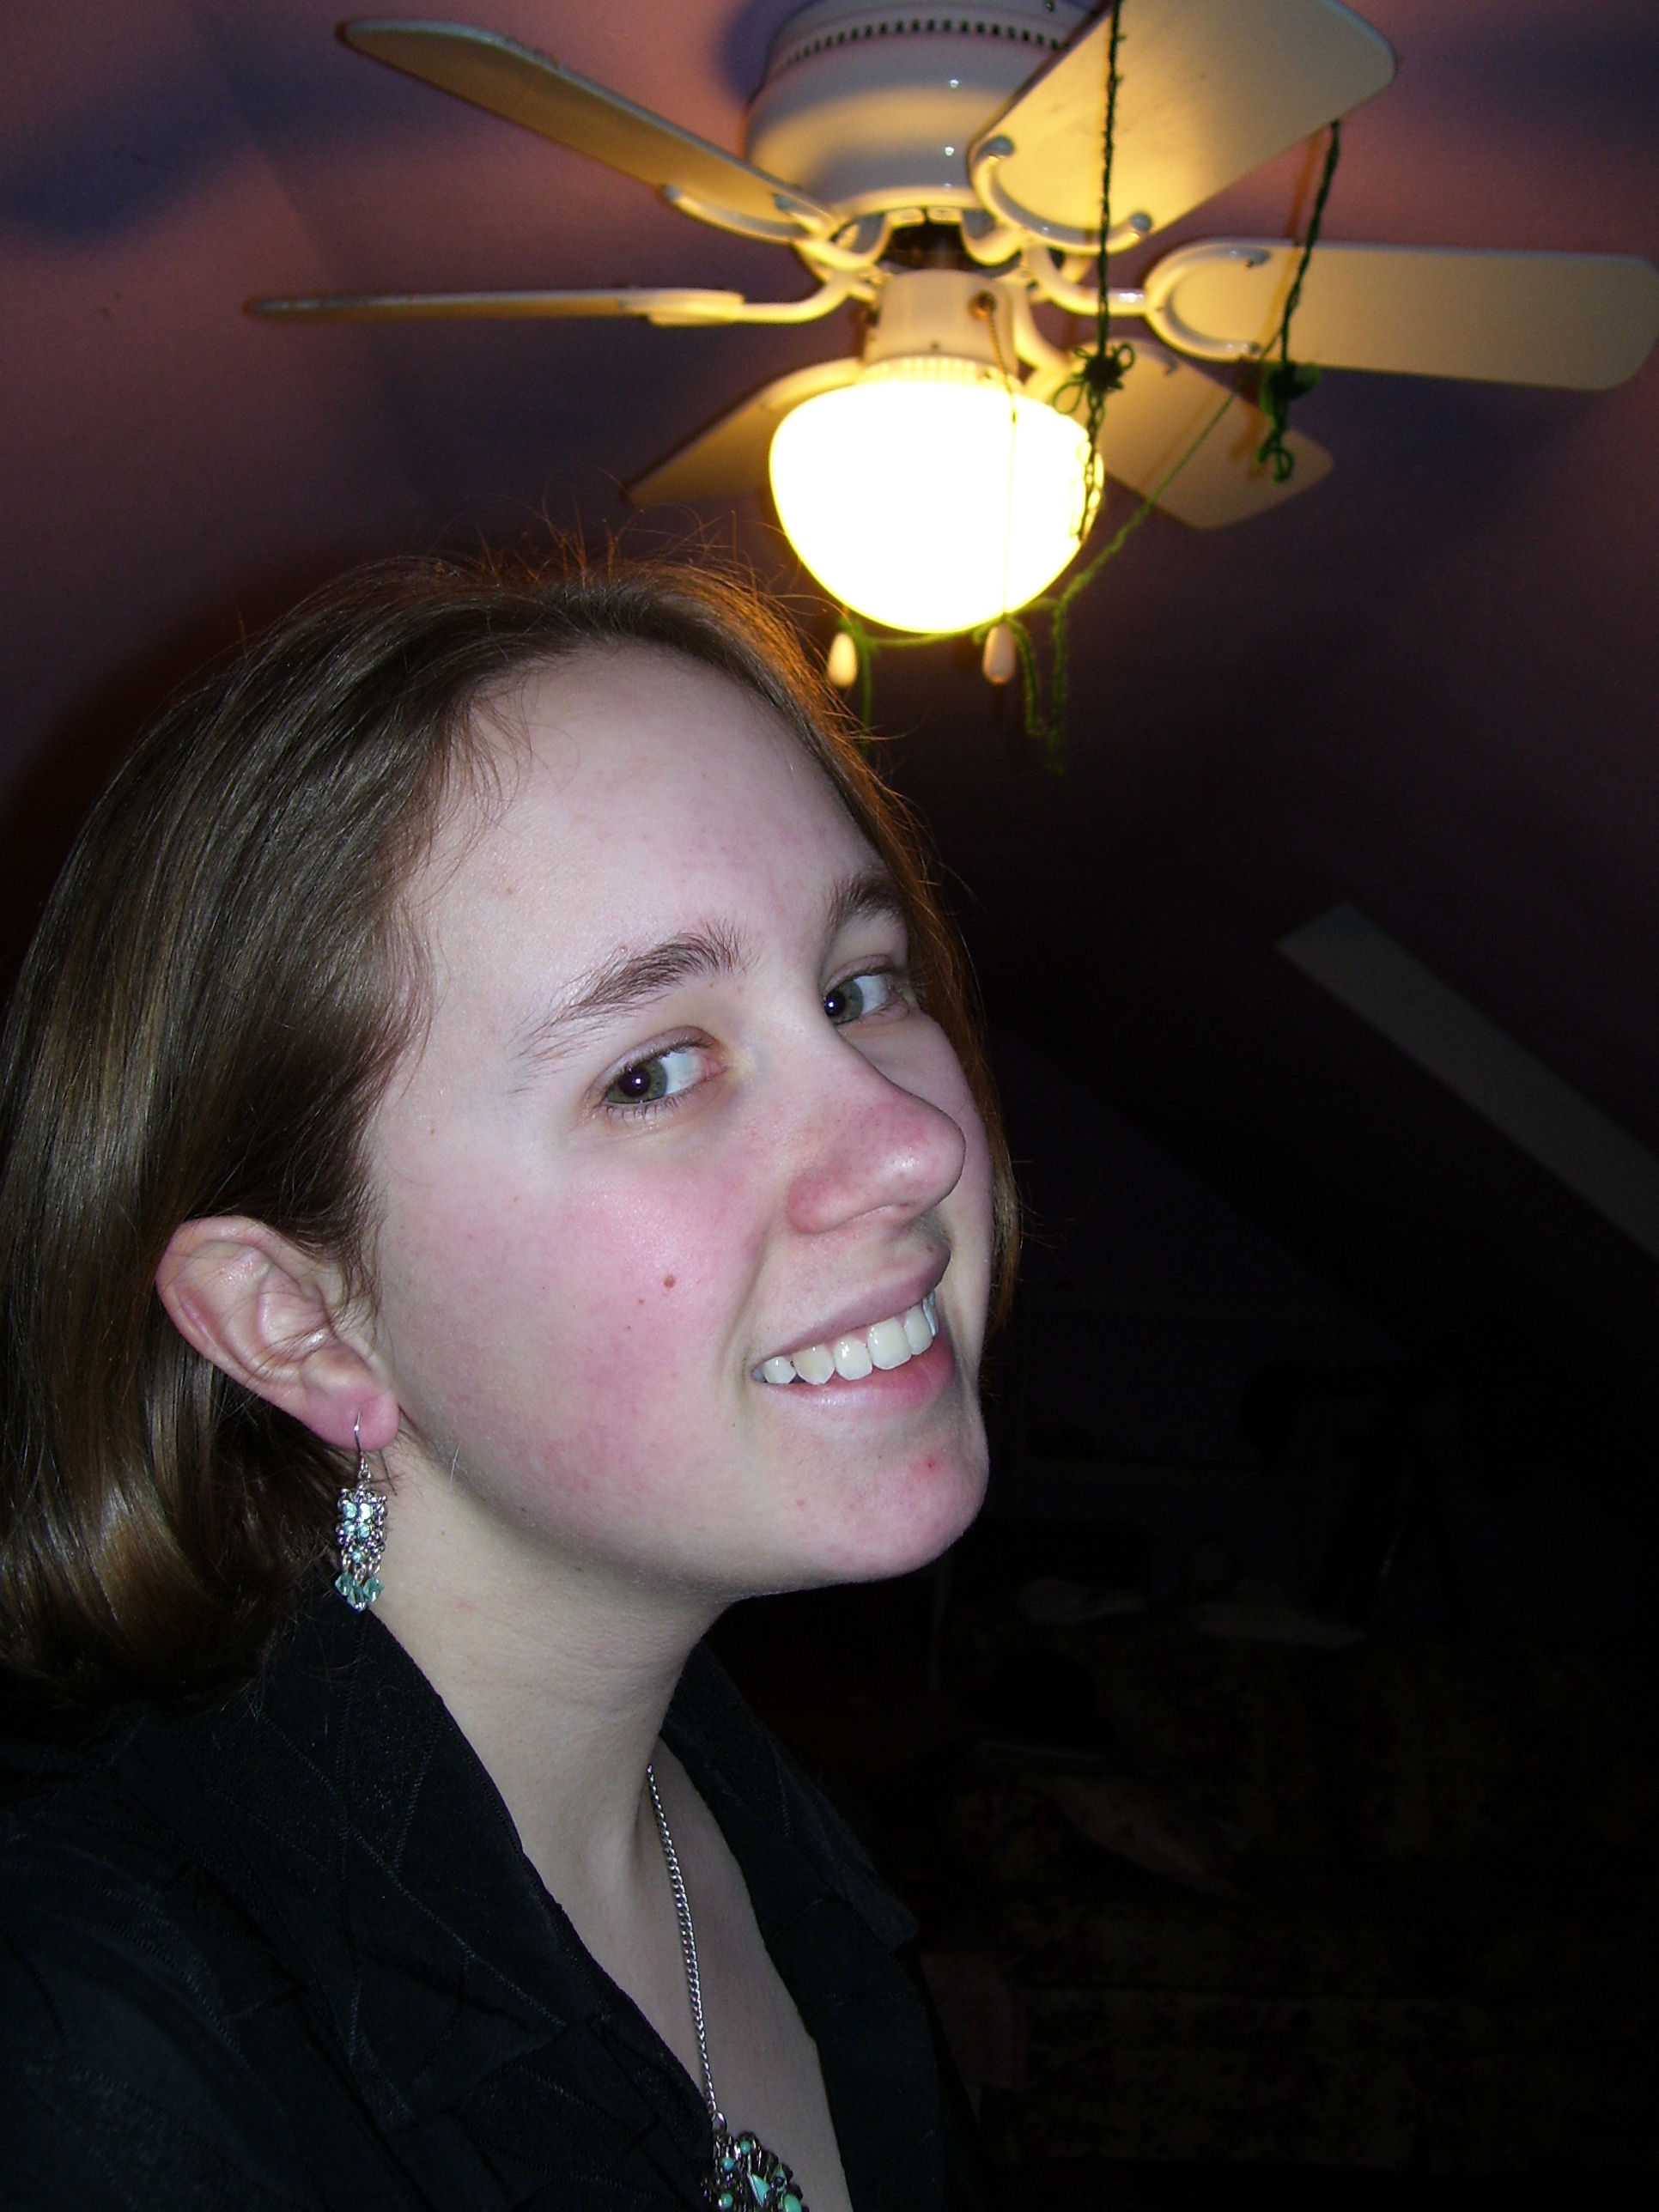
Those interested in her work can contact her here.

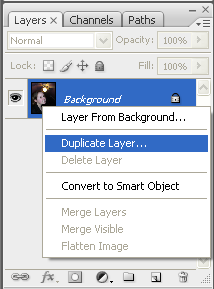
  1. Open your image in Photoshop
  2. As always, duplicate the background layer before anything else.

  3. Highlight the ear. This can be done rather easily using the quick-select tool (alt+click to remove from selection).

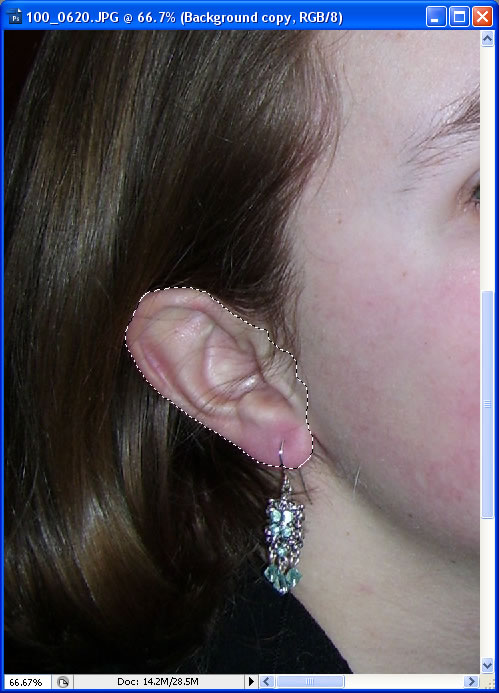
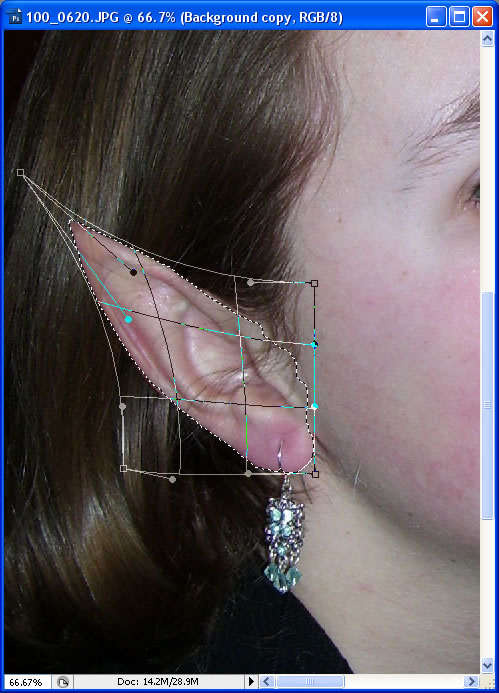
  4. Now warp the ear (edit->transform->warp) to your liking.

    (Note that you may have to remove part of the ear from the background. See any tutorial on removing objects from images – you could, for example, simply copy and paste a piece of hair over the old ear)


    That takes care of the elf ears – now let’s give her vampire teeth as well. We could use the same technique we used for the ears, but that leaves the tooth looking flat and two-dimensional; I prefer a technique which causes the tooth to affect the lips as well.

  5. Select the tooth in the same way you selected the ear.

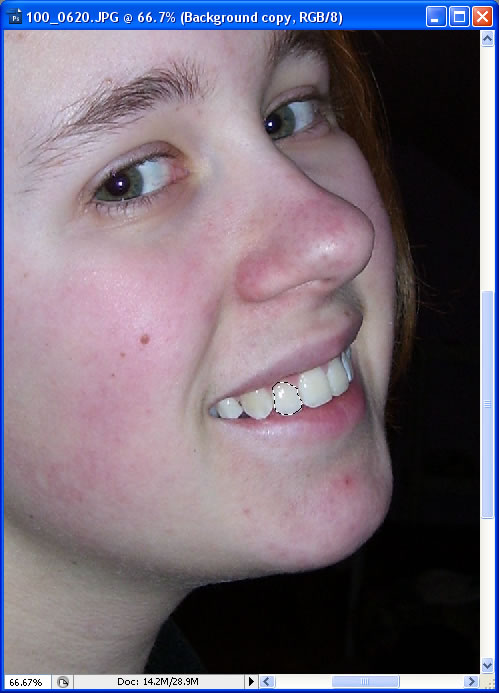
  6. Now, using the lasso tool, add to the selection (by holding shift) a small portion of the lip and chin just below and around the tooth, as so:

  7. Open the liquify window (Filter->liquify). Using the forward-warp tool and a brush about the size of the tooth, drag the tooth downwards. Try to do it one one swift motion, using undo (ctrl+alt+z) to go back as many times as necessary.

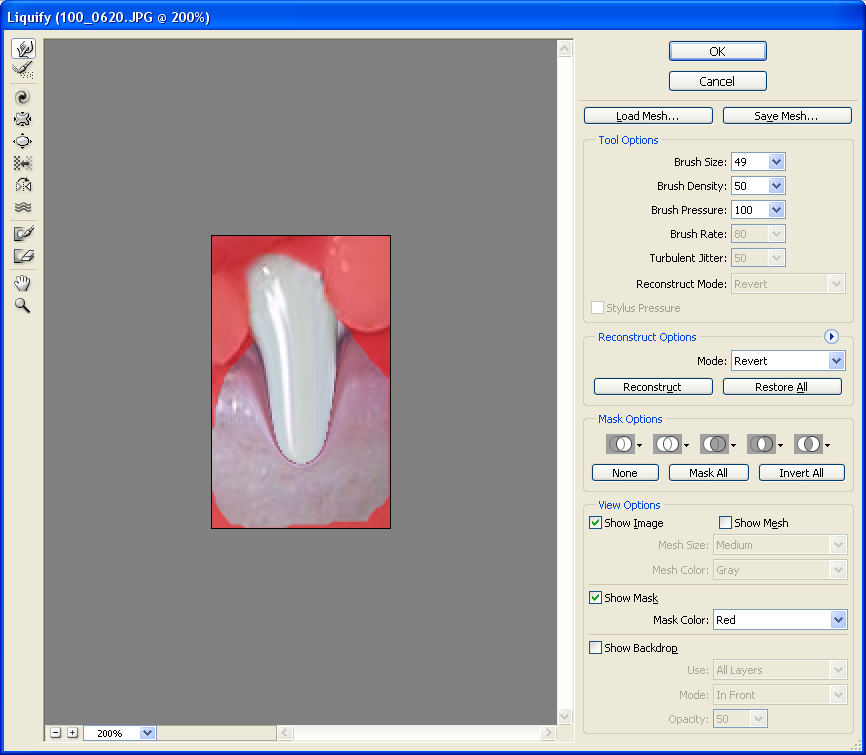
  8. Select the Reconstuct Tool on the left, and use it to give your tooth a point. You may want to lower your brush density and experiment with different reconstruct modes (under ‘Tool Options’) to get it just right.

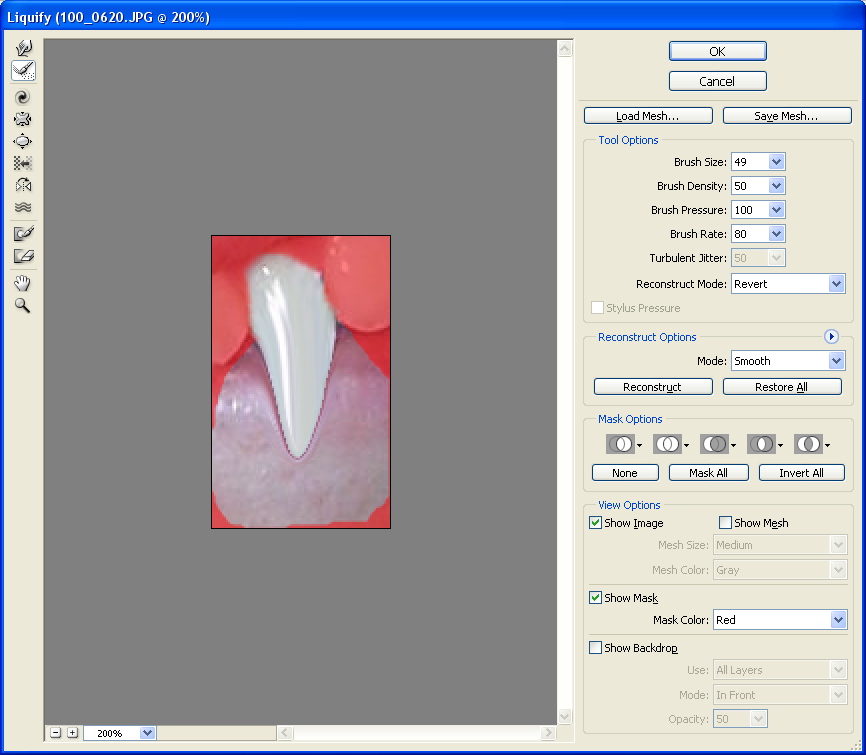
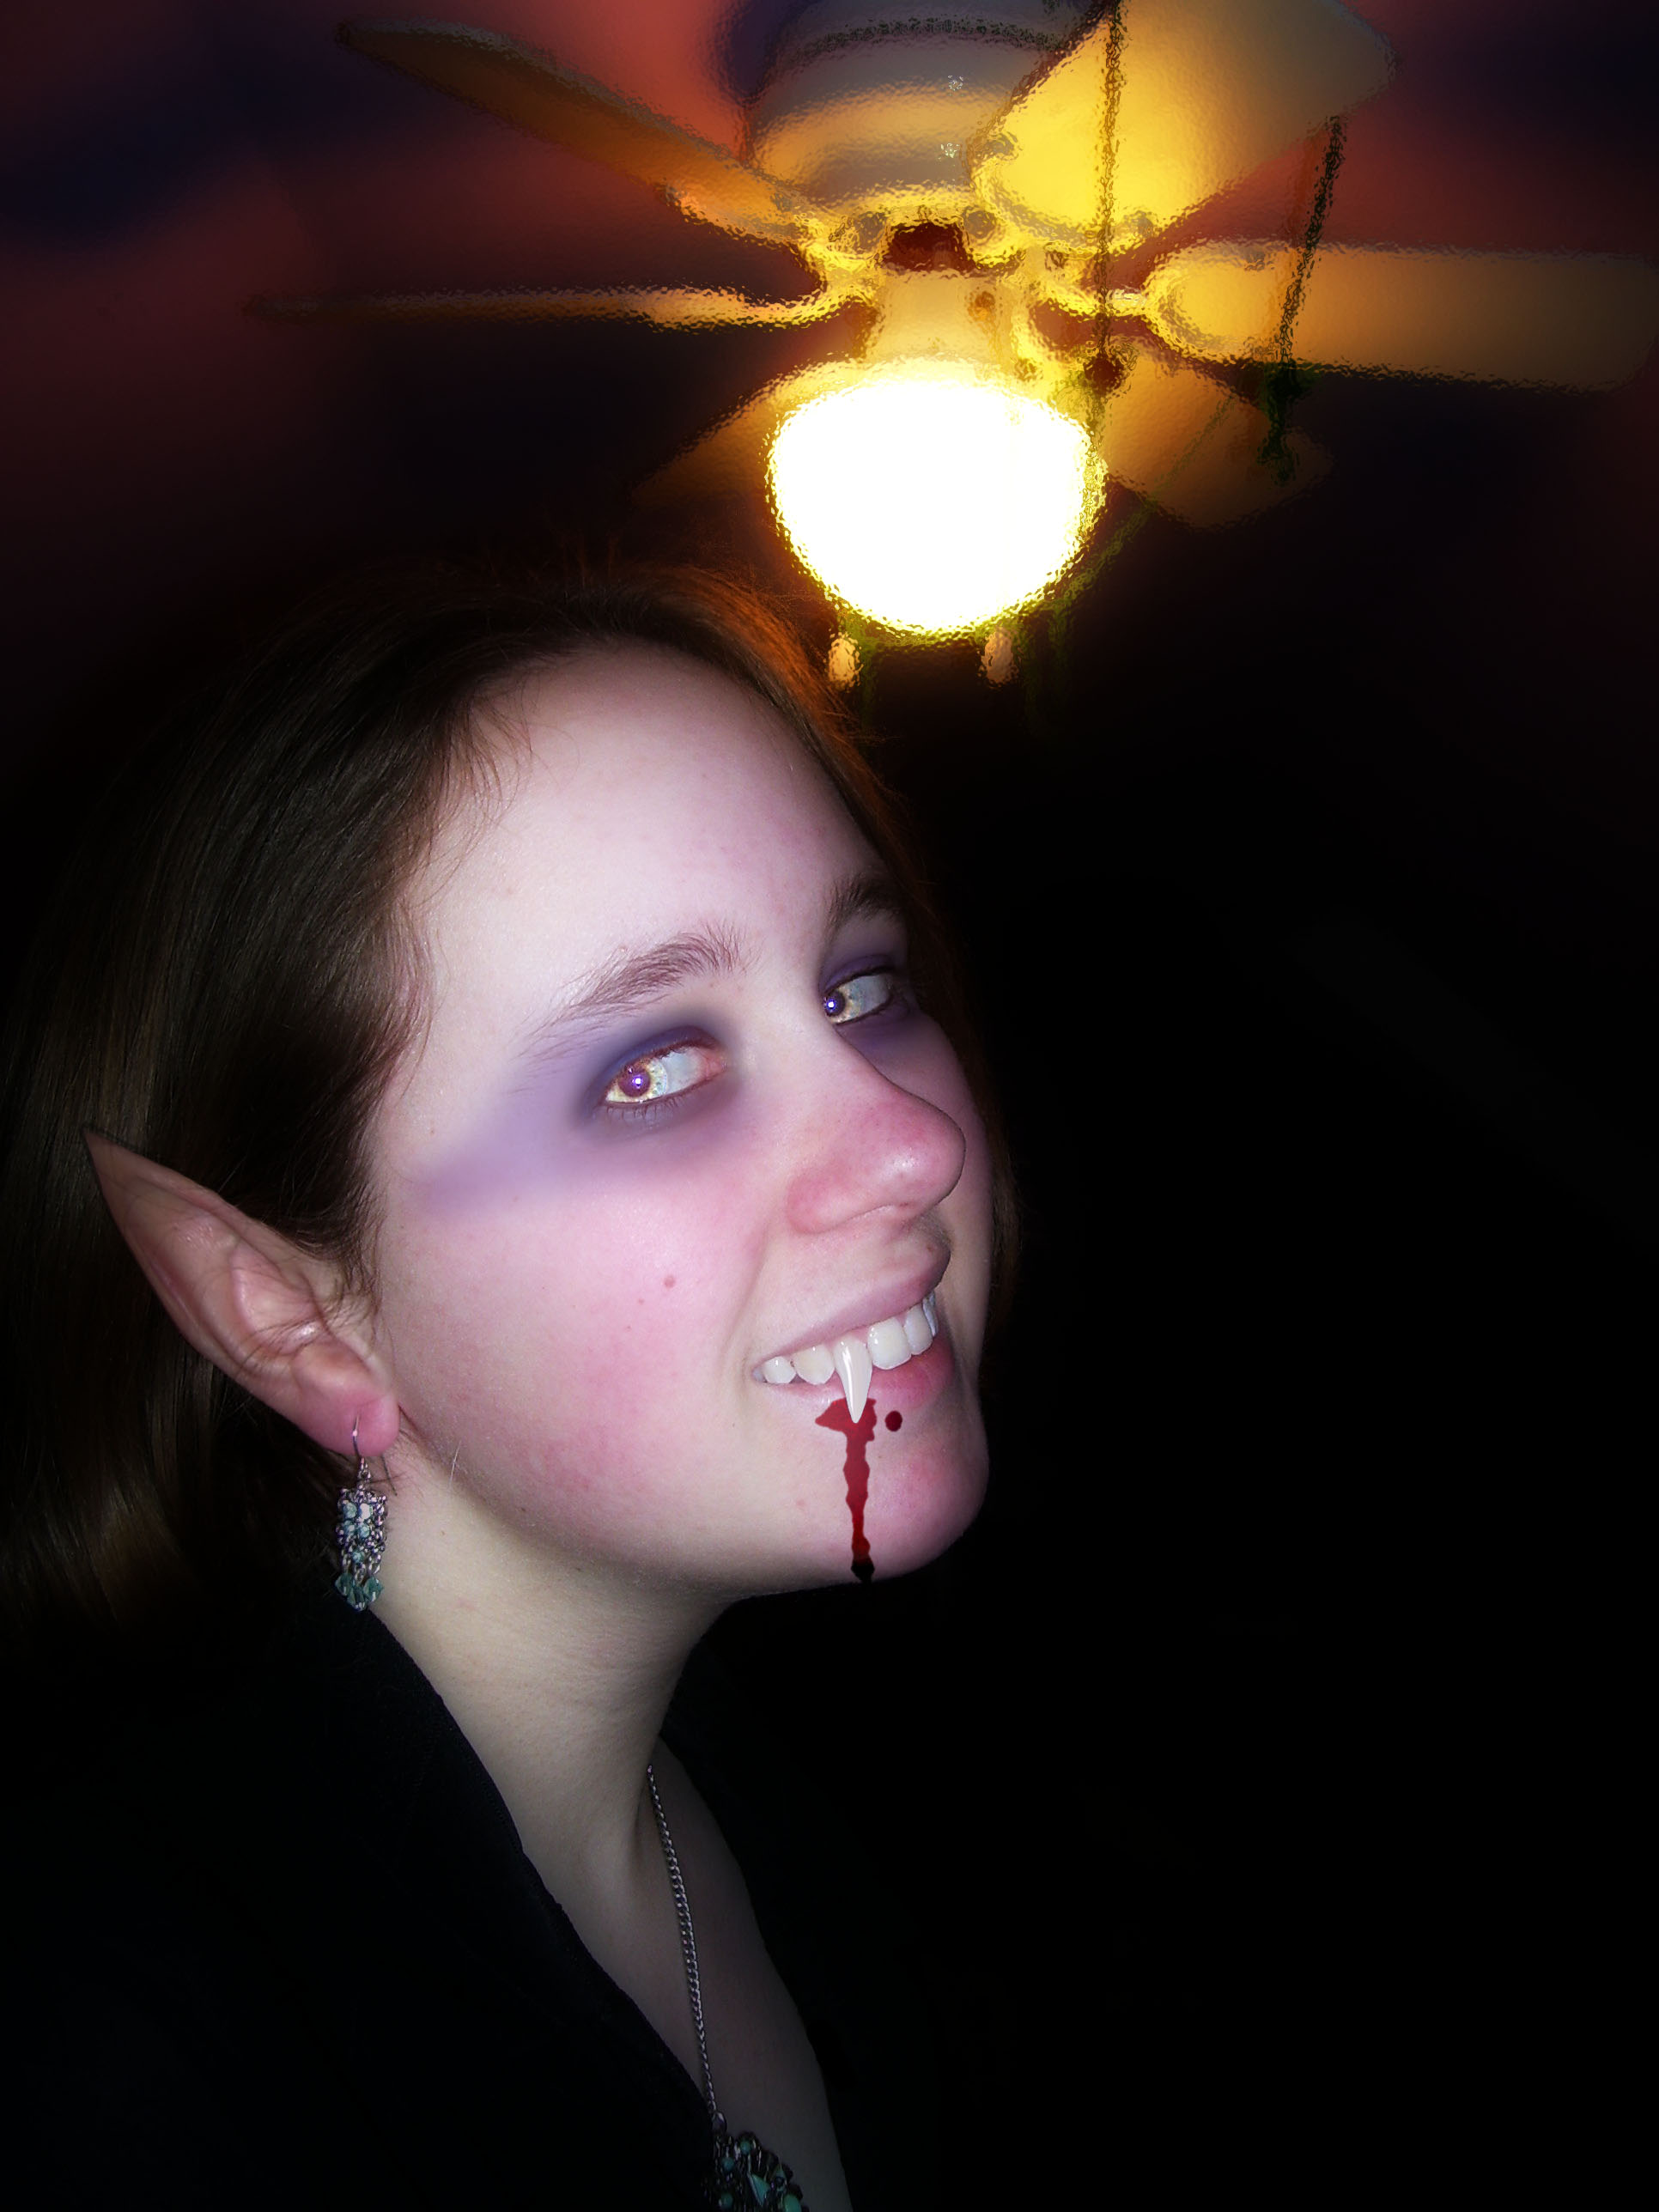
  9. That’s it! Here’s what the finished tooth looks like:

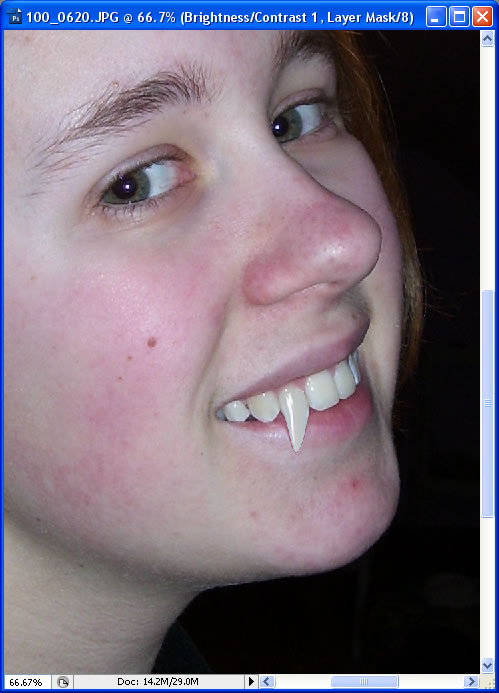
    And, after a few more tweaks, the final image:

How to Double the Length of Any Essay (Without Writing a Word!)

5
Filed under Uncategorized

As promised, here are a few tips to help double the length of any essay.

All of these statistics/instructions are for Microsoft Word 2007, but they apply equally well to older versions of Word or OpenOffice.

Replace All the Periods
Increase in size: 42.9%
How to do it: Go to edit->replace and place a period (.) in both boxes. Highlight the period in the "replace with" box, and click on "more" in the lower-right hand corner. Then click format->font.
Under "size," increase the font-size significantly – I used 16 in this example.
Click OK, then hit "replace all."

Increase the Paragraph Spacing
Increase in size: 21.6%
How to do it: Higlight everything (edit->select all), right-click->Paragraph. Set "Line Spacing" to multiple, and set it to something between 2 and 3 (or between 1 and 2 if it’s a single-spaced essay). I set it to 2.5 for this example.

Change the Font Size
Increase in size: 9.1%
How to do it: The font size is right next to the font face, at the top. After highlighting everything, increase it by up to a whole point – I set it a half-point larger (11.5) for this example.

Use a Different Font
Increase in size: 9.1%
How to do it: Highlight everything, and just change the font from something other than the default, Calibri. I changed it to the old default, Times New Roman (12 pt font), for the 9.1% increase, but there are probably other similiar-looking fonts that will increase that even more.

Change the Margins
Increase in size: 7.2%
How to do it: Go to Page Layout->Margins->Custom and increase the margins. They default to 1" all around – I changed it to 1.15" all around.

Change the Character Spacing
Increase in size: 7.1%
How to do it: Select everything (ctrl+a), then right-click->Font->Character Spacing. Change the spacing to something small (Half a point or less). I use 0.3pt

All effects put together:
Increase in size: 114.5% (over double!)